I took a one hour basic acrylic class last weekend put on by Clear Scraps. The extruded acrylic is pretty easy to use. I ended up getting several
12"x 12" sheets (important to note, they are actually 11 7/8" square). I love the look of the alcohol inks on it. For this piece, I trimmed a piece of acrylic down. It cuts pretty easily with scissors or my paper cutter. I then ran it through my e-bosser using the
4" Sizzix Bigz circle die. Don't bother trying to cut it with a wafer thin die tho, it doesn't work, even after removing the protective film. I see they have precut
circles on their website.
This week's
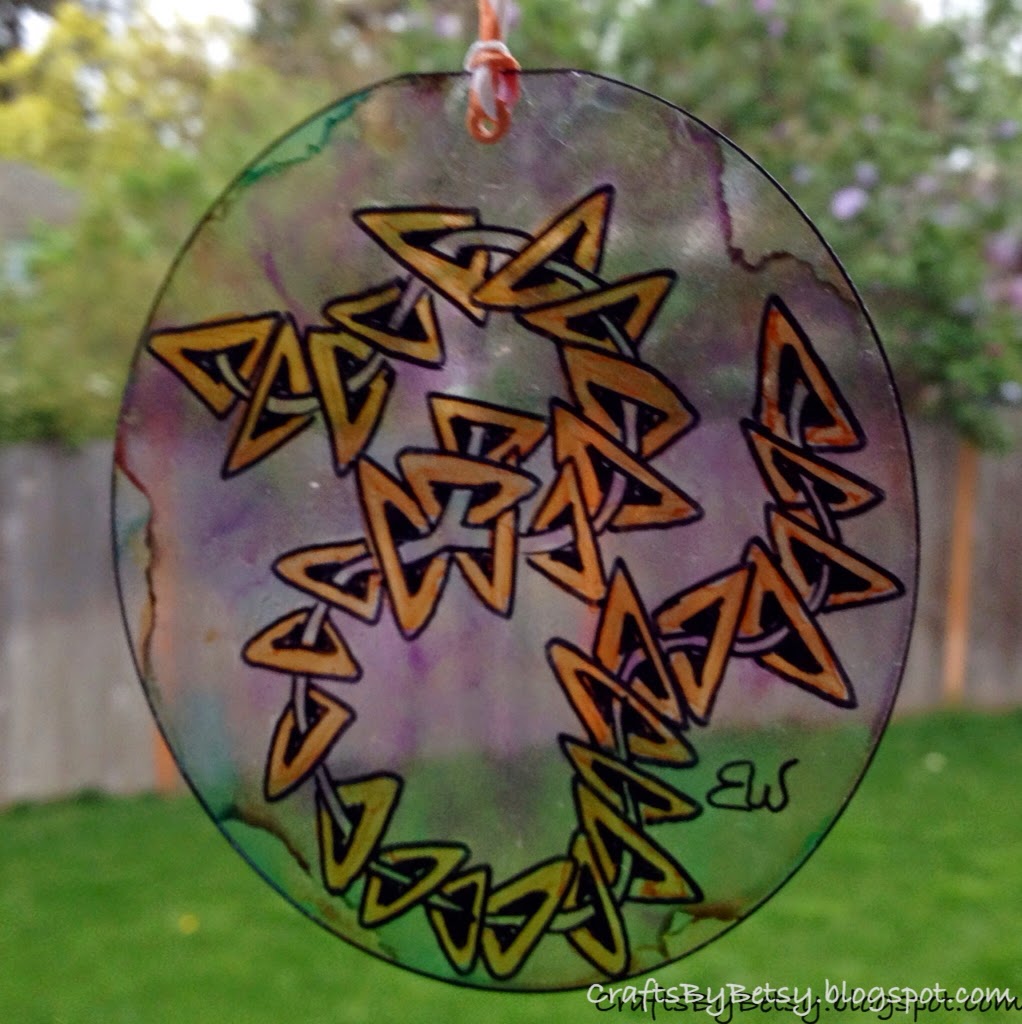
Diva Challenge is to use the new Zentangle® pattern,
Rixty. It's a fun and easy pattern. Because it's such a bold and basic pattern it worked well with the acrylic. I removed one side of protective film then used a
Sakura Identi-pen to draw Rixty. Next I flipped it over, removed that side's protective film, and added the alcohol inks with a felt dauber. I used Ranger Adirondacks but could've used Copic Various inks too (if I only had them!). After it dried, which was only a matter of seconds, I was able to "erase" the ink within the Rixty pattern by using non-acetone fingernail polish remover. This was the recommended product from the class. I'm guessing I could also have used alcohol, but I stuck with what had been recommended. I used a Q-tip to get most of it. I used a copic sketch brush tip to color in the pattern. Because the alcohol pen pushes and picks up the color I was able to clean up the lines where the Q-tip didn't quite get it all. I kept the tip of my marker clean by wiping it on scrap paper as I continued coloring and picking up the unwanted ink. I could have left Rixty clear by using the colorless blender instead. I punched a hole in the acrylic and used an eyelet to finish it off. Next, I used a black copic marker on the edge of the circle just to make it look more finished. Finally, I used a Krylon UV resistant clear acrylic spray in the hope of keeping the alcohol inks from fading.


Here is a sample tag of their cast acrylic that came in this precut tag shape. This type is rigid and you'll want to stick with precut shapes as you can't cut it with scissors, etc. Mine is also colored with alcohol ink and a gold opaque we used in class with the same daubing technique I used above. Once I got home with it I used a sharpie on the other side. I also learned that not all sharpies are created equal. At first I used a sharpie stylo pen. The next day I realized it smudged where I picked it up. To my amazement, I was able to wipe off the entire drawing. After checking their website, only Fine, Twin Tip, Chisel and Super are permanent. So, lesson learned.
The Zentangle® Method is an easy-to-learn, relaxing, and fun way to create beautiful images by drawing structured patterns. It was created by Rick Roberts and Maria Thomas. "Zentangle" is a registered trademark of Zentangle, Inc. Learn more at zentangle.com.


This looks beautiful. Sounds like a neat product to try. Off to go look at it a bit.
ReplyDeleteVery unique! I like it! :)
ReplyDeleteI do like it too. Very beautiful.
ReplyDeleteI love the way you have made acrylic circles ... I guess it is one in stages but it sure looks like several. So creative!! ~ Diane Clancy
ReplyDeletehttp://www.dianeclancy.com/blog/2014/04/new-official-tangle-rixty-challenge-entry/
There are two sun catchers, each photographed twice. Once with a white background, and a second photograph outside so you can see the transparency.
DeleteWonderful idea! They are really beautiful!
ReplyDelete