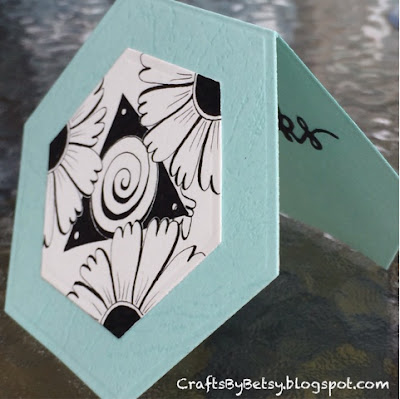
Thursday, June 29, 2017

New BuJo pages and the "Bluebird of Happiness"

I'm starting a new bullet journal.  I thought I'd share my calendar pages. I use my BuJo as an art journal, writing journal, to do lists, and just about anything else that I used to write on scraps of paper including trying out new tangles.  As with everything else in my life, Zentangle® has permeated here.  :-)
Ciceron creates my calendar

For more information on bullet journaling, check out this link.  There are tons of examples out there, but my advice is to just start one....you will adjust it to meet your needs, no matter how much you plan.  Their beauty is that you make them into what you like and need, not someone else's version (tho inspiration is always good).

Here I've used MoFins as a divider.

I've noted all the tangle names under each border.  

Check out the lower left.  I had intended to draw Coil but I got the curve "wrong". In true Zentangle fashion, I let it have its own life.  I tried Coil again lower right. :-)


And, check out this blue bird of happiness.  Yes, I know, not a blue bird...Art Impressions has some of the best stamps.  Anyway, I wanted to point out just how much Zentangle has inspired this card.  Absolutely no Zentangle patterns, but.... I have learned so much about shading, contrast and making something appear 3D from my Zentangle practice.  Pretty awesome right?  I stamped onto white cardstock with rich cocoa Momento ink, masked the image and then worked on the background using a combination of Distress and Distress Oxide inks.  Then I colored in Mr. Bluebird a/k/a buzzard with Polychromos colored pencils.  

Thanks for stopping by!

Friday, June 16, 2017

Hex 6 fragments

And I thought I was about done....ha!  I'm still playing with hexagon fragments I'm creating with my Papertrey coverplate die.

Triangles keep emerging.  Sometimes deliberately, sometimes not....

Rearranged, Maryhill triangles also emerge.

Cubes of patterns...

...that can be added to or rearranged over and over.

And a glimpse of my outside table (luckily no wind!)

Of course I needed to update my prestrung Zentangle® journal with hexagon fragments.

And this is how my May BuJo calendar turned out.  I have a similar hexagon theme for June. Will I have sufficient fragments?

Back to the cube.  Remember it is a central point with 3 radiating lines out to alternating corners.

I liked Emingle (Ambler?) in the earlier tile....and I had played with it in a cube in this earlier post.
I wanted to explore with it more.

Note, if you start Emingle at an interior corner, you end up with an "impossible" type frame. 

Here I added weight to two sides (I always chose the outside edges of the diamond to make it easier).

And here is a rounded version

Let's not leave out triangulation! (in hind site I like being more selective with this technique vs hitting each corner as I later did.

And this is an Emingle variation of Quadrose.

And look at this unassuming little fragment.  The black makes the cube.  I aura-ed those lines with brown and then filled in leaving a hilight where I added generals white charcoal.

I love it in multiples.  Do you see the black lines form hexagons, as do the brown shapes in addition to the die cut fragments themselves.

And did you notice that the white also forms hexagons?   
So even tho 6  would seem the appropriate number of posts to explore hexagons, I believe I've only just scratched the surface.  I will likely mix in other things as well, but I'm sure there will be more hexagon adventures to follow.

I'll leave you with this card.  It utilizes Spellbinders Kaleidoscope die that I used to cut both watercolor paper and black cardstock.  Arukas is done in black Pigma micron ink and the blue is watercolor with some colored pencil shading and gelly roll hilites. 

I hope you enjoyed your week and I appreciate you sticking with me for this long post!

Saturday, June 10, 2017

Inspiration is good!

Terry's card
Isn't this a beautiful card?  It's NOT one I made...Terry, a friend of mine made it while enjoying an afternoon of die cutting at my home.  She had pre made the background piece using Distress sprays. Isn't it just gorgeous? And the die cut flower silhouettes really set it off.  They are Wildflowers by Tim Holtz for Sizzix.  The dotted rectangle die is by Lawn Fawn from their small stackables set.

So after she inspired me with her die cutting, I made these graduation cards using Mixed Edge Diamond Layering Basics by tonic studios.  I bought the set on sale at my local craft store.  While they were still nicely together, I thought I'd take advantage of their even spacing and inlay the pieces. 
I used the same dies to emboss an inner piece that I first die cut with Lawn Fawn Lift the Flap to conceal the gift card.  The congrats die is by Hero Arts.


And later in the week, A die I had been waiting on finally arrived... Kaleidoscope by Spellbinders.  Wow! Must have been the hexagons because again I couldn't stop!  I have a feeling this will be in yet another hexagon ZIA (Zentangle® Inspired Art) post as it will make an awesome reticulum, don't you think?  

FYI, all the cards shown above are A2 or 5.5 x 4.25 inches.

And just because...during an evening walk I caught the best light on these lovely roses.  I thought I'd  share them with you. 


Thanks for stopping by!

Thursday, June 8, 2017

Hex 5 Fragments

More Hexagon play.  To check out all my hexagon posts, click on the label on the right or just click here.

It's easy to keep Tripoli in line with hexagon tiles! 

With a couple variations.

Merging into the early steps of Phroz.
And if you make an ark that skips one corner thru the center of the tile and just keep rotating the tile then and add rice shapes along the edge... 

You easily have a beautiful pattern that is closely related to Quandry, Fife and Bales.  

If you arc from one side of the hexagon to the other.

So fun! But I need a quick break to get some cards done before Hex 6 (of course there has to be at least six!)   See you soon.


Thursday, June 1, 2017

Hex 4 Fragments

I hope you're enjoying my hexagon addiction.  This is Hex 4 and there's still no end in sight....

It took me awhile to realize the outer shape of the hexagon is the outer shape of a cube.  So I think my fascination started back when I was seeing the vesica piscis in a cube.  For those of you who are or have enjoyed A Beginners Guide to Constructing the Universe, I jumped from chapter 2 to 6 once I started with the 6 sided hexagon, or at least as soon as I realized it was a cube! 

The simple cube.

Here I die cut a set from from watercolor paper.  This time I left the pieces intact to draw the cubes and then color. I used Derwent Inktense pencils lightly and then added water.  (I'm still using the Papertrey Ink hexagon cover plate die.)

I also cut another from black cardstock and used its black reticulum.

Here is the final result turned into a 4 1/4 by 5 1/2 inch (A2) card.  That's a Hero Arts Thanks die.

Back to the cube in the hexagon, it's really a center point with 3 radiating lines that form 3 diamonds. 

I filled in one of those diamonds.  I really liked that snowflake design created by the white diamonds when you put 3 tiles together. 

Can you see it better here?

There are really 2 tiles going on here.

A happy accident that occurred when I drew it in reverse.  Luckily I didn't toss that first one, instead I drew more of both versions.

I might have gotten a little carried away.  This is one (er, I guess 2!) of my favorite fragments.

And here I set them inside the reticulum so you can see the hexagons easier.  You can really get lost in rearranging the tiles.


And just for fun, a larger tile.  I cut it and it's card base using the Spellbinders Nestabilities hexagon dies.  


More to come!