Showing posts with label class mosaics. Show all posts

Sunday, October 1, 2017

Where did September go?

My finished September calendar.  I'm really happy how this Assunta tangle worked out.  Now, what to do for October?
first tile ever with grandkids!

We were busy traveling for part of the month. The best part of September was tangling with my grandkids.


Last week's Diva Challenge was crazy 'NZeppel. I used a very old tile that had a string from a stencil.  Sorry I forgot to photograph it before I started.  I chose to ignore parts of the string and I added more lines here and there.  

My end result on this Apprentice tile reminded me much of my earlier polished stone 'NZeppel.  

And my first try at Well well well.  Mine is on a hand cut tile from brown cardstock.  The brown is close to the color of a bag I want to tangle and I thought I'd try out colors to see if the brown and black would show up on such a dark color.  

I'm glad I have Zentangle® to help keep me centered with all the chaos in our country and in the world.  I still wonder if I'm making any difference whatsoever, but at least I can gather my thoughts and breathe amid the chaos if I just take it one step at a time.  

Friday, September 16, 2016

Class lines

I had a really fun class last week. We focused on parabolic lines and stringing Zendalas®. I prepared these kits in advance. The boxes housed blank Zendalas, a drawing surface, protractor, bijou tiles, pencil and a bookmark ready to be tangled on. I used an envelope die by Sizzix to make the boxes, scoring additional lines to convert it from an envelope to a box.


Wow, look at all those strung tiles!  And all were done without the use of a straight edge!  Cool right?
Check back next week for a closer look at bookmarks I've been making.
Have a wonderful week!

Friday, June 24, 2016

Mini-class

... also known as an afternoon of friends and Zentangle....then, wow! Where did the time go?
We started out with "tiles" I had prepared before hand. I wanted the initial focus to be the Zenstone technique and thought we could try out several colors and shapes before slowing down to draw.
They did pretty awesome don't you think?
Then, I was excited to show them the organically grown Maryhill I recently stumbled across. If you missed that post, here's a link to the step-outs.
And if that wasn't cool enough, both sent me photos of their tiles after they finished them at home. (Beaming :-)
Thanks for stopping by, have a great day!

Friday, March 11, 2016

Beginnings

I had an introduction to Zentangle® class recently. My students took off and ran with it! And look at that shading! So good for beginners! Small classes allow for more one-on-one time however, being more personal, I tend to get side tracked easily. This time I forgot to take a photograph of their tiles! But this allowed for students to complete tiles at home. Here are photos that have made their way back to me intending to be shared with you.
Welcome to an awesome community...Zentangle!

Friday, January 29, 2016

Chapter 2 black tiles class

Since we were familiar with working on black tiles, I opted to teach something new, Maryhill (gee, wonder why that's one of my favorites?) After trying it out on one of the new Bijou black, we further explored line width and color blending on a larger tile.
After all those lines, we quickly tried something more organic, Abundies. We didn't have time to finish...
We all finished up our tiles after class. Here are the final results. Nice work!
Art and photo by student, used with permission
I'm glad students sent me photos of their tiles, that gave me incentive to finish my teaching tiles...I don't always do that.
Check back in a day or two for a look at what else I've been up to this week.

Sunday, January 17, 2016

An afternoon of tangling

A class, or just tangling all afternoon with a friend? We explored black tiles (introduction class) including, testing out the tools, giving consideration to highlights with line width, charcoal white and Zenstone. We explored layering techniques using black and gray on top of both the Gelly Roll and Zenstone. What a nice way to spend a rainy afternoon!

Friday, November 27, 2015

May your bags be full of art supplies!

Photos from our fun class last Sunday:


Check out these gorgeous payment envelopes!


Happy Thanksgiving!


Friday, August 28, 2015

Zenith et al.

Zenith

Zentangle® released a new tangle this week, Zenith. As a CZT I had the privilege to play with it a while longer. This is a very versatile and elegant little tangle, and I can't forget to add, easy. Lots of room for variations, lots of shading opportunities.

I put together a class for Zenith and border tangles (Bordering on Bliss), complete with this little 4 x 4 inch tri-fold card. It's perfect for border tangles and you can add a sentiment to the center, or mount or draw in either a 3.5 x 3.5 tile or a Bijou. The card is made from Fabriano studio 140 lbs cold press watercolor paper that I trimmed to 12" x 4", scored and die cut the concentric squares. I should warn you that running the paper thru the die cutting machine did take some of the watercolor texture away, and pressed in some additional texture from my cutting plate. You could also use a ruler and craft knife to cut the openings.

As usual, I wanted to make a gift of this card, but I needed to hang on to it for awhile. I wanted to share with my students how the leaf behind Bijou wasn't originally going to be black. A mis-step challenged me to rethink my options and I ended up with something even better than I had planned (in typical Zentangle fashion).
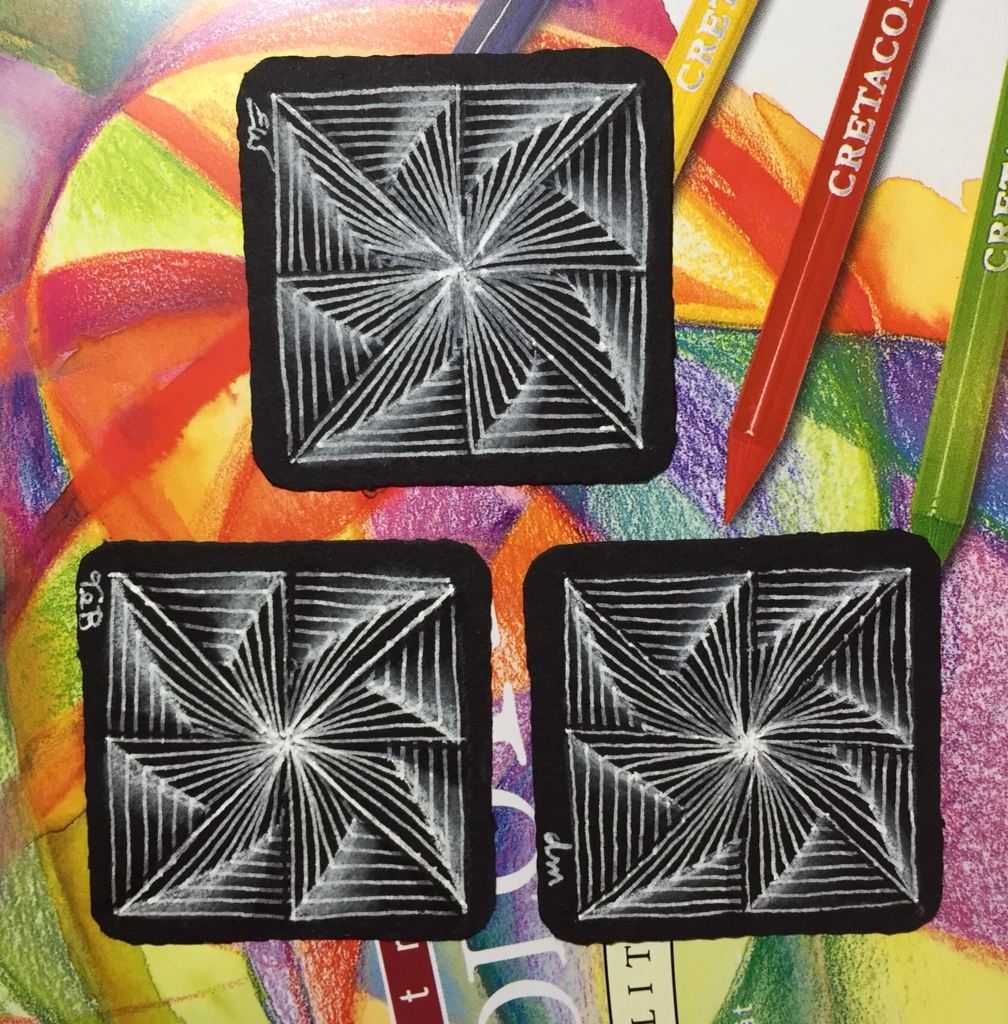
Student tiles
Origami envelope for card

Unfortunately, I only had one student after all that planning! No worries tho, we had fun trying out different variations of Zenith, different shading options and we made Zenith turn a corner too! One good thing about being the only student, you get your choice of the give away and you pick what tangles you want to try! We tried some other border tangles and we played with paper and made this little origami envelope for the card. And, I have another gorgeous little payment envelope!

Enjoy some more Zenith examples....

Recently, I awoke. thinking about tangling (so much better than the old days when I'd think about work) and how I should start a segment called "fix that!" Where I show a before and after of something that didn't go as planned! (The Bijou card above would have been perfect, but, alas, I have no "before" photo. I do, however, have another example:

This was my attempt at an all over Zenith. Instead of going right to left, or left to right (which should have been easier) I sort of drew around a couple of corners and then tried to make them meet towards the center. As you can see, it wasn't quite coming out. So after some appreciation of what I liked, some consideration of what I wanted to either downplay or downright cover up, here is the outcome.....Fix that!

I've got to say tho, that I need to change the name from Fix That! I don't mean to imply there was a mistake. More to the point is the challenge...that we all need practice making the best decision from where we are now. This could be to leave it or to add to it. Nobody really gets to start over. So, I've been thinking of other names, like "I wish I meant to do that", or "Making Lemonade", "Things only get better from here", "Panning for gold", "Art is too precious to wad it up and throw it away" and "Why not try again?", but I think I may have hit the mark when I thought of "Still Hanging in There! (And I won't even talk about the acronym.) What do you think?

Enjoy your week!